
Learn Endosonography
Welcome to the step-by step Tutorial that will illustrate the approach of a full examination using the radial endoscope. Lets dive right in.
Click here for advice on the best endosonography books.
My first time... where are the anatomical landmarks?
1. Finding the Aorta und inferior Vena cava
Using the endoscopic image, the endoscope is maneuvered and placed in the descending duodenum past the major duodenal papilla. After placement the full focus can be directed to the sonographic image, since the rest of the procedure is done during endoscopic withdrawal.
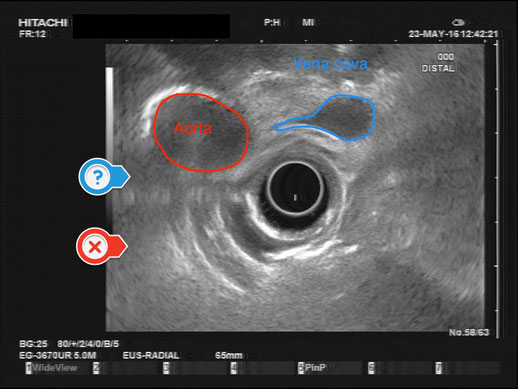
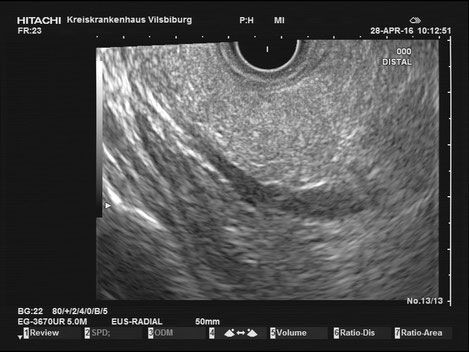
Ideally, two important vessels can already be visualized, as seen in the Figure above. On the left side of the image the round aorta is depicted, whereas the vena cava can be identified on its right side as the “deformable” vessel. Both vessels are in the axial plane.
At the beginning of the procedure, there is still a lot of air inside the intestines, preventing optimal intestinal wall adhesion and imaging. That’s why from now on forward the one of the most important steps (or button) is sucking air out of the gut. Some endoscopists continually press the button to suck air out, whereas others intermittently press the button.
The other way to optimize the sonographic image is by filling the ballon. In my experience when you start out with endosonography your focus should be placed on minimizing the air. Nevertheless, when the sonographic image remains unsatisfactory the ballon can be of great assistance. Another advantage of filling the ballon is stabilizing the endoscope and thus preventing the endoscope from slipping back into the stomach.
Before we start withdrawing the endoscope, we want the aorta (X) and vena cava (?) to be on the left hand side of the image, stacked on top of each other. This can be achieved by turning the small knob forward (right-side or clockwise), similarly to the movement used with an ERCP endoscope in the duodenum.
2. Finding the uncinate process of the pancreas


Where is the pancreas? – This is our next question. If we followed Step 1 and optimized the image (by constantly reducing the air and depicting the vessels on the left hand side), then by retraction pancreatic tissue will appear in the middle of the screen. To make sure we are on the correct path, we can observe anatomical structures on the way.
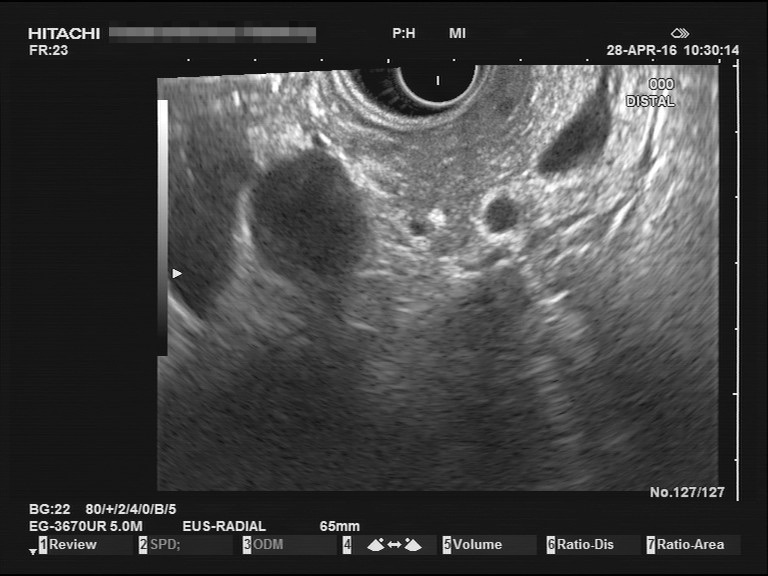
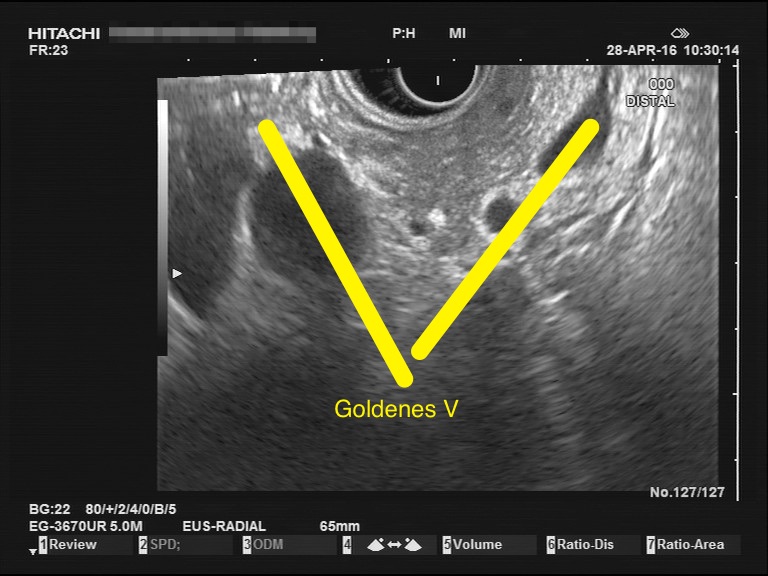
In Step 1 the aorta and vena cava were seen as round structures due to the axial plane. During withdrawal, the plane changes and the aorta and vena cava are displayed in the longitudinal plane, still on the left hand side. Parallel on the right side of the Image, the superior mesenterial artery and vein can be seen as smaller vessels. Although the origin of the superior mesenterial artery into the aorta can not be presented, one can imagine both vessels forming a “V” shape, which is referred to as the “golden V”, inside which, the uncinate process of pancreas arises.
3. The papilla und the double duct sign
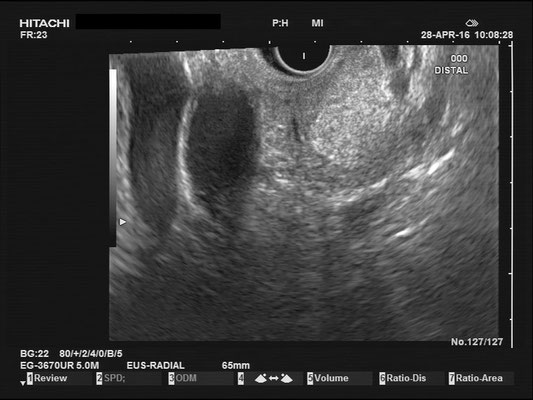
Since we preform the procedure through withdrawal of the endoscope, the uncinate process of pancreas is depicted first. Next we can appreciate the embryologic ventral pancreatic parenchyma, which is hypoechoic in comparision to the dorsal aspect of the pancreatic head.
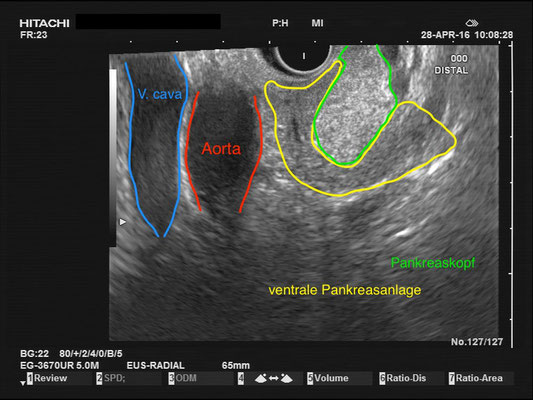
In the Figures above, you can identify the vena cava (blue), aorta (red), the embryologic ventral pancreatic parenchyma (yellow) and pancreatic head (green). Lying within the ventral pancreatic parenchyma the major pancreatic duct can be visualized.
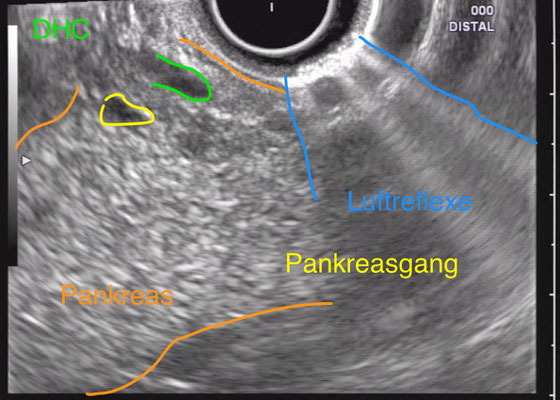
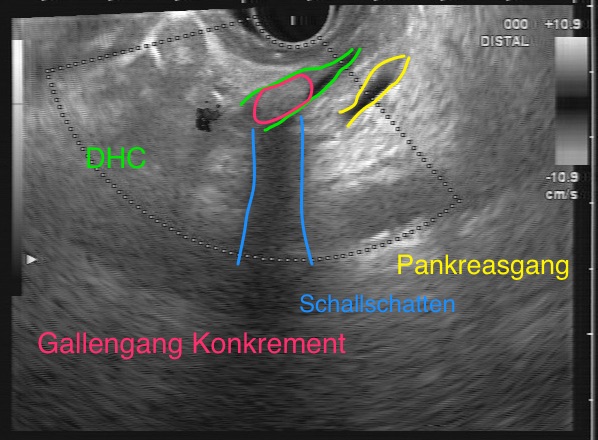
In the pancreatic head we can identify the hypoechoic major duodenal papilla region with the junction of the common bile duct (CBD) and pancreatic duct to form the ampulla of Vater. Together this forms the “double duct sign”. Since gallstones are often found in the distal CBD, visualization of the papilla is vital.


4. Pancreatic head
It is important that while examining the pancreatic head you use small and subtle movements. These mostly involve wrist maneuvers or upper body rotation, as well as rotation of the endoscopic shaft. This will allow you to investigate the whole pancreas and optimize your view. Unfortunately, at the level of the papilla the endoscope can easily slip back into the stomach. When this happen, return to step 1 and place the endoscope into the correct position and try again. Sometimes using more ballon filling the second time around can aid to stabilize the endoscope at the level of the papilla.
Fun Fact:
If you have a patient where the endoscopic ultrasound shows the pancreatic duct lying above the CBD and the junction of both ducts can not be shown, then you might have a case of pancreatic divisum!


In the Figure above you can see the pancreatic neck which connects the pancreatic head and tail. The large vessel in the middle is the portal vein.
5. Following the splenic vein ::::::::::::::::::::::::::::::::::::::::::::::: to the spleen
The investigation of the pancreatic neck, body and tail can be preformed trans-gastric. When finishing with the pancreatic head, the procedure can be easily continued through further withdrawal into the stomach. However, if your view is impaired due to the air in the stomach and you find yourself lost, it helps to use the endoscopic image to place yourself directly infront of the pylorus and begin your examination there. The sonographic landmark to look for in this case is the splenic vein.


The splenic vein (or possible the portal vein if you are near the liver hilum) is easily visualized. This landmark can be followed all the way to the spleen. The pancreatic parenchyma lies on top of the splenic vein and is therefore proximal to the transducer. Again our procedure is preformed while retracting the endoscope which allows full focus on the ultrasound image and prevents iatrogenic injury.
When pulling back and examining the pancreas, movements such as rotation of the endoscope must be preformed to enable visualization of the complete extent of the pancreatic parenchyma. During this phase, the depiction of the pancreas becomes more vertical (as seen in the Figure).
Finally, we reach the tail of the pancreas which ends at the spleen. The splenic vein and artery can normally be identified here. In addition, with EUS we can also examine the spleen, left kidney and left adrenal gland. The left adrenal gland can be found in between the aorta (anechoic round structure due to the axial plane) and the left kidney.

6. The End
And there you have it. One complete radial examination of the pancreas and other important anatomical structures. Don’t be worried if you are unsuccessful the first time round. Enjoy learning EUS. Make sure to check out the rest of the website such als “endoscopic ultrasound images" in order to familiarize yourself with normal and pathological findings.
Alternative method:
The procedure described above is not the only way to examine the pancreas and other organs. Since the whole examination is performed through withdrawal of the endoscope after its placement, this is an ideal approach for beginners. Use the landmarks above identify where you are and where you are going.
A common alternative when examining the pancreatic head: